Table of Contents
- Development
Development
How to run the Application
Install dependencies:
Ubuntu/Debian:
sudo apt install libusb-1.0-0-dev libudev-dev libffi-dev libssl-dev build-essential
macOS:
brew install libusb
Nix:
The easiest way to get all necessary tools is to run nix-shell from the utils directory of this repository. You need to have Nix installed.
Arch:
sudo pacman -Syu && sudo pacman -S libusb
Fedora/CentOS:
sudo yum -y install libusb libudev-devel libffi libffi-devel openssl-devel && sudo yum groupinstall "Development Tools" "Development Libraries"
Windows
- Install python 3.10.x by downloading from python.org
Do NOT install python from the Microsoft Store! It runs in a different execution environment that creates enormous headaches!
Confirm your installation in Windows PowerShell:
python --version
- Must have Visual Studio Community Edition installed. Be sure to select Visual C++ during installation.
- Download libusb-1.0.dll. Use 7-Zip to decompress the .7z file. Copy
libusb-1.0.dllfromVS2019/MS64/dllto your/Windows/System32directory.
- Configure Windows PowerShell to run scripts. See: About Execution Policies. In a PowerShell window run:
Set-ExecutionPolicy -ExecutionPolicy Unrestricted -Scope CurrentUser
Set up virtualenv
Specter is using hwi-2.1.0 which by now supports higher Python versions than Specter itself. Specter currently supports Python 3.9 and 3.10.
git clone https://github.com/cryptoadvance/specter-desktop.git
cd specter-desktop
pip3 install virtualenv
virtualenv --python=python3 .env
source .env/bin/activate
pip3 install -r requirements.txt --require-hashes
pip3 install -e . # this does not compile the babel translation-files
note: invoking commands in the Windows PowerShell is slightly different:
# use 'python' instead of 'python3'
virtualenv --python=python .env

# activating virtualenv
.env\Scripts\activate
Run the server:
cd specter-desktop
python3 -m cryptoadvance.specter server --config DevelopmentConfig --debug
After that, Specter will be available at http://127.0.0.1:25441/.
If pip install fails on cryptography==3.4.x
If you're using pip older than v19.0, upgrade it with pip install --upgrade pip. This is needed to use the pre-built cryptography wheel instead of building it.
If this still doesn't work, certain platform/python3 version combos require a Rust compiler. Install via:
- Linux/macOS:
curl --proto '=https' --tlsv1.2 -sSf https://sh.rustup.rs | sh
You'll need to ensure that $HOME/.cargo/bin is in your PATH. Verify this by running:
rustc --version
note: you may need to add $HOME/.cargo/bin to your path in .env/bin/activate
How to run the tests
TODO: Need more thorough tests!
In order to run the tests, you need bitcoind and elementsd binaries available. For Linux/Mac, there is some support for installing/compiling them.
For bitcoind you can do:
./tests/install_noded.sh --bitcoin binarywill install bitcoind in tests/bitcoin
or:
./tests/install_noded.sh --bitcoin compilewill compile bitcoind in tests/bitcoin
For elementsd:
./tests/install_noded.sh --elements compilewill compile elements in tests/elements
If you're not interested in elements, you can skip the liquid specific tests as described below.
Set up the dependencies:
pip3 install -e ".[test]"
pip3 install -e .
You need a virtual environment based on Python 3.10 for the tests to run successfully, otherwise you get this error:
TypeError: __init__() got an unexpected keyword argument 'ignore_cleanup_errors'
If you have a local bitcoind already installed:
# Run all the tests
pytest
OR run against bitcoind in Docker (deprecated):
# Pull the bitcoind image if you haven't already:
docker pull registry.gitlab.com/cryptoadvance/specter-desktop/python-bitcoind:v0.22.0

# install prerequisites
pip3 install docker

# Run all the tests but not elm ones
pytest -m "no elm"
Running specific test subsets:
# Run all tests but not the slow ones
pytest -m "not slow"

# Run all tests but not the elements
pytest -m "not elm"

# Run all tests but not the slow ones and not the slow ones
pytest -m "not elm and not slow"

# Run all the tests in a specific test file
pytest tests/test_specter.py

# Run all tests in a specific file matching "Manager"
pytest tests/test_specter.py -k Manager

# Run a specific test
pytest tests/test_specter.py::test_specter

# Run tests and show the fixture-setup and usage
pytest --setup-show
Print the logging output live to the terminal:
pytest --capture=no --log-cli-level=DEBUG
Hardware-attended Jade tests
tests/test_jade_hardware.py exercises Specter's HWI integration end-to-end against a physical Blockstream Jade. It is gated by --run-jade-hardware and skipped by default, so GitHub Actions ignore it without any workflow change.
Run with -s so operator prompts reach the terminal:
pytest --run-jade-hardware tests/test_jade_hardware.py -s
Three tests, increasing operator effort:
| Test | What it does | Operator action |
|---|---|---|
test_jade_enumerate_via_specter |
HWIBridge.enumerate() finds the Jade and returns a fingerprint |
Connect Jade, unlock |
test_jade_extract_xpub_via_specter |
Pulls xpub at m/84h/0h/0h (mainnet) |
Confirm xpub export on device |
test_jade_sign_psbt_via_specter |
Signs a canned testnet PSBT through Specter's sign path | Boot Jade in Temporary Signer mode, scan SeedQR, confirm tx |
The signing test uses the public BIP-39 abandon vector (abandon abandon ... about) so the PSBT fixture matches anyone's Jade once they load that seed. Setup procedure:
- Power-cycle the Jade so it shows the boot menu.
- Choose Temporary Signer -> Scan SeedQR.
- Display
tests/fixtures/jade_seedqr_abandon.png(orcat tests/fixtures/jade_seedqr_abandon.txtfor the ASCII version) and scan it with the Jade camera. - When Jade asks for the network, select TESTNET.
- Press Enter at the test prompt.
- Confirm the transaction on the Jade screen when it pops up (~99,500 sats to a testnet bech32 output, ~99,500 change auto-validated, 1,000 fee).
Temporary Signer state is held in RAM only and wiped on power-cycle/USB-unplug — your real seed is not affected. Expected master fingerprint for the abandon vector is 73c5da0a; the test fails fast with a clear hint if the loaded seed is wrong.
The fixture PSBT (tests/fixtures/jade_hardware.psbt) was generated with embit against m/84'/1'/0'/0/0 of the abandon vector, including a synthetic non_witness_utxo so Jade can verify the input amount per the SegWit fee-spoof mitigation.
Get the log-output of bitcoind side by side with the test-output. For sure you will only see the logs if the test fails.
pytest --bitcoind-log-stdout
# Probably better to redirect into a file
pytest --bitcoind-log-stdout > testoutput.log
Check the cypress-section on how to run cypress-frontend-tests.
Code-Style
Before your create a PR, make sure to blackify all your changes. In order to automate that, there is a git pre-commit hook which you can simply install like this:
pre-commit install
Developing on tests
We use pytest and for frontend-testing the amazing cypress.io.
bitcoin-specific stuff
There are some things worth taking a note here, especially if you rely on a specific state on the blockchain for your tests. Bitcoind is started only once for all the tests. If you run it each time it's starting with the genesis-block. This has some implications: * The halving-interval for regtest is only 150-blocks * At the same time, still 100 blocks need to be minded in order to make the coins spendable. * This combination results in that you can't rely on how many coins get mined if you want some testcoin on your address * This also means that it makes a huge difference whether you run a test standalone or together with all other tests * Depending on whether you do one or the other, you cannot rely on transactionIDs. So if you run a test standalone twice, you can assert txids but you can't any longer when you run all the tests
Cypress UI-testing
Cypress is just awesome. It's quite easy to create Frontend-tests and it's even recording all tests and you can immediately see how it went. So each test-run, the tests are kept for one day (see the "artifacts-section" and you can watch them by browsing the artifacts on any gitlab-job-page (right-hand-side marked with "Job artifacts").
Executing the tests is done via ./utils/test-cypress.sh:
# make sure you have npm on the path

# run the tests
./utils/test-cypress.sh run
# open the cypress application (to develop/debug/run tests interactively)
./utils/test-cypress.sh open
The test_specifications which get executed are specified in cypress.json.
More details on cypress-testing can be found in cypress-testing.md. Make sure to read it. The tooling we created around cypress might be quite helpful in daily development. In short, you can do this and the last command will give you a reliable development-environment which is the very same whenever you start it anew:
./utils/test-cypress.sh snapshot spec_empty_specter_home.js
./utils/test-cypress.sh dev spec_empty_specter_home.js # does not seem to work yet on MacOS
# CTRL-C
[...]
Flask specific stuff
Other than Django, Flask is not opionoated at all. You can do all sorts of things and it's quite difficult to judge whether you're doing it right.
One strange thing which we're doing to get the tests working is forcing the reload of the controller-code (if necessary) here.
The if-clause might be quite brittle which would result in very strange 404 in test_controller. Check the archblog for a better explanation. If Someone could figure out a better way to do that avoiding this strange this ... very welcome.
More on the bitcoind requirements
Developing against a bitcoind-API makes most sense with the Regtest Mode. Depending on preferences and usecases, there are three major ways on how this dependency can be fullfilled: * Easiest way via Docker * The unittests on Travis-CI are using a script which is installing and compiling bitcoind * Manually run local bitcoind in Regtest
Automatically mine and deposit test coins
In order to make the "docker-way" even easier, there is a python-script which detects a running-docker-bitcoind and/or is boots one up. Use it like this:
python3 -m cryptoadvance.specter bitcoind
This will also: * automatically mine some coins for the addresses found in the wallets at ~/.specter/wallets/regtest/*.json * automatically mine a block every 15 seconds (but not to the wallet-addresses anymore)
However, this is NOT a prerequisite for running the tests (--docker or not).
After that, you can configure the bitcoin-core-connection in specter-desktop like this: * Username: bitcoin * Password: secret * Host: localhost * Port: 18443
Manually mine and deposit test coins
If you're not using the integrated Docker method above, start your local bitcoind in regtest mode:
bitcoind -regtest -fallbackfee=0.0001
In another terminal initialize a default wallet to mine to:
bitcoin-cli -regtest createwallet satoshiswallet
Get a new address to deposit newly mined coins:
bitcoin-cli -regtest getnewaddress
Mine coins to the new address
bitcoin-cli -regtest generatetoaddress 101 <address>
Create a wallet in Specter and send test coins to a receive addr for the new wallet
bitcoin-cli -regtest sendtoaddress <address> <amount>
Mine the next block when you want a pending tx to be confirmed
bitcoin-cli -regtest generatetoaddress 1 <address>
Cleanup: Stop your local regtest instance
bitcoin-cli -regtest stop
IDE-specific Configuration (might be outdated)
Visual Studio Code
Debugging
You can easily create a .vscode/launch.json file via the debug-window. However this setup won't work properly because the python-environment won't be on the PATH but the hwi-executable need to be available in the PATH. So adding the PATH with something like the below is working with VS-COde 1.41.1 and the python-plugin 2019.11.50794.
{
    // Use IntelliSense to learn about possible attributes.
    // Hover to view descriptions of existing attributes.
    // For more information, visit: https://go.microsoft.com/fwlink/?linkid=830387
    "version": "0.2.0",
    "configurations": [
        {
            "name": "Python: Flask",
            "type": "python",
            "request": "launch",
            "module": "flask",
            "env": {
                "FLASK_APP": "cryptoadvance.specter.server:create_and_init()",
                "FLASK_ENV": "development",
                "FLASK_DEBUG": "1",
                "PATH": "./.env/bin:/usr/local/sbin:/usr/local/bin:/usr/sbin:/usr/bin:/sbin:/bin"
            },
            "args": [
                "run",
                "--no-debugger",
                "--no-reload"
            ],
            "jinja": true
        }
    ]
}
More information on debugging can be found at the python-tutorial.
Unit-Tests
In VS-Code there is a very convenient way of running/debugging the tests:

In order to enable that, you need to activate pytest support by placing a settings.json file like this in .vscode/settings.json:
{
    "python.pythonPath": ".env/bin/python3.7",
    "python.testing.unittestEnabled": false,
    "python.testing.nosetestsEnabled": false,
    "python.testing.pytestEnabled": true
}
More information on python-unit-tests on VS-Code can be found at the VS-python-documentation.
PyCharm
| Edition | Version |
|---|---|
| PyCharm Community | 2020.3.2 |
| #### Debugging | |
| Once the project is setup and all dependencies are installed: | |
* Create a new xml file under <PROJECT_ROOT>/.idea/runConfigurations/specter-server.xml |
|
| * Open the file, paste the xml from below and save | |
| * Restart the IDE |
You should now be able to run and debug the application from the PyCharm run panel!
<component name="ProjectRunConfigurationManager">
  <configuration default="false" name="specter-server" type="PythonConfigurationType" factoryName="Python">
    <module name="specter-desktop" />
    <option name="INTERPRETER_OPTIONS" value="" />
    <option name="PARENT_ENVS" value="true" />
    <envs>
      <env name="PYTHONUNBUFFERED" value="1" />
      <env name="FLASK_APP" value="cryptoadvance.specter.server:create_and_init()" />
      <env name="FLASK_ENV" value="development" />
      <env name="FLASK_DEBUG" value="1" />
      <env name="PATH" value="./.env/bin:/usr/local/sbin:/usr/local/bin:/usr/sbin:/usr/bin:/sbin:/bin" />
    </envs>
    <option name="SDK_HOME" value="" />
    <option name="WORKING_DIRECTORY" value="$PROJECT_DIR$" />
    <option name="IS_MODULE_SDK" value="true" />
    <option name="ADD_CONTENT_ROOTS" value="true" />
    <option name="ADD_SOURCE_ROOTS" value="true" />
    <option name="SCRIPT_NAME" value="flask" />
    <option name="PARAMETERS" value="run --no-debugger --no-reload" />
    <option name="SHOW_COMMAND_LINE" value="false" />
    <option name="EMULATE_TERMINAL" value="false" />
    <option name="MODULE_MODE" value="true" />
    <option name="REDIRECT_INPUT" value="false" />
    <option name="INPUT_FILE" value="" />
    <method v="2" />
  </configuration>
</component>
Unit-Tests
PyCharm already comes with integrated support for pyTest.
To run/debug all tests:
* Right click on the <PROJECT_ROOT>/test folder and execute Run pytest in tests
* Edit the automatically generated run configuration, change the working directory to your <PROJECT_ROOT> directory
* Apply, Save & Run again
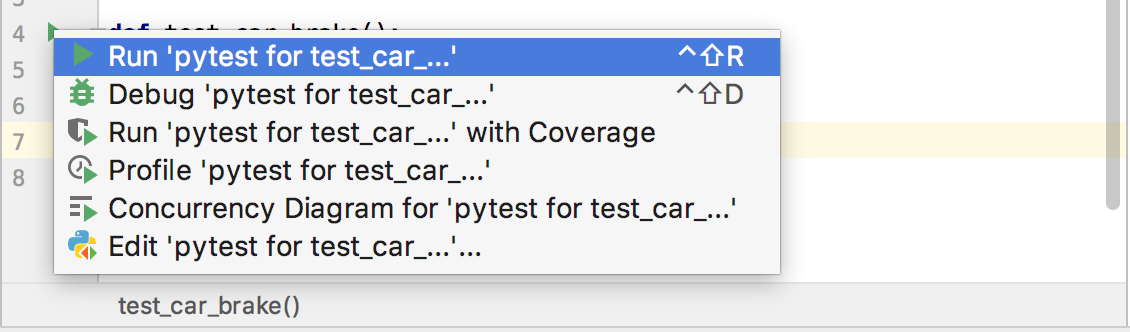
To run/debug an individual test, open the script and run/debug by clicking the play icon on the left side of the method declaration.
Guidelines and (for now) "best practices"
General File Layout
Python/flask is not very opinionated and everything is possible. After reading (this)[https://blog.ionelmc.ro/2014/05/25/python-packaging/#the-structure] and (this)[https://blog.ionelmc.ro/2014/05/25/python-packaging/#the-structure] we decided for the "src-approach", at least the most obvious parts of it.
setup.py is not (yet) as complex as listed there and setup.cfg is not even (yet?!) existing. If you see this to need some improvements, please make it in small steps and explain what the benefits of all of that.
Some words about dependencies
As a quite young project, we don't have many dependencies yet and as a quite secure-aware use-case, we don't even want to have too many dependencies. That's sometimes the reason that we decide to roll our own rather then taking in new dependencies. This is especially true for javascript. We prefer plain javascript over any kind of frameworks.
If you update requirements.in you will need to run the code snippet below to generate a new requirements.txt.
You need pip-toolsfor that. If you get errors, upgrade pip and pip-tools to their latest versions.
$ pip-compile --generate-hashes requirements.in
This approach is good for both security and reproducibility.
Some words specific to the frontend
We're aware that currently the app is not very compatible on different browsers and there is no clear strategy yet on how (and whether at all) to fix that.
Some words about style
- The icons are coming from https://material.io/resources/icons/?style=baseline
- Colorizing the icons make them much more expressive. Current favorite colors are:
- nice orange #F5A623
- nice blue #4A90E2
- A designer would probably rant about all these bad choices. Professional help, especially in the frontend, is very much appreciated.
Troubleshooting and migration to python3.10
We're currently migrating to python3.10 while alos supporting older versions. This is creating some extra challenges for those that want to run 3.10 but don't have 3.10 available in their standard-package. So here are some hints on how to get that going.
pyenv is a great tool to granually install. The installation worked great. However, i don't want to pyenv to screw up my existing python setup. So i only use pyenv if i explicitely do (put that in a script):
export PYENV_ROOT="$HOME/.pyenv"
command -v pyenv >/dev/null || export PATH="$PYENV_ROOT/bin:$PATH"
eval "$(pyenv init -)"

echo "    --> now do:omething like:"
echo "        pyenv shell 3.10.4"
So i'm using pyenv shell but before you install now a 3.10 version via pyenv install 3.10.4 make sure to install sqlite3:
sudo apt-get install sqlite3 libbz2-dev
If you miss that, you might later have issues while pre-commit-hooks kick in, something like No module named '_sqlite3.
Now you can switch your shell to use python 3.10 via pyenv shell 3.10.4 and after that create your extra virtualenv which uses 3.10:
python3 -m virtualenv --python=python3.10 .env310